skip to main |
skip to sidebar
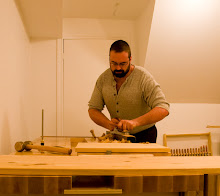
Now to cut the rabbets. The rabbet locations were all set out directly from the story-pole. The marks were placed on both sides and the marks joined with a straightedge rather than relying on a square to be square. I planed the edge of a piece of scrap to act as a fence for my back-saw. I used a piece of material the same thickness as the cheek on the saw to space the fence out from the line. I could have also put the cheek on the other side of the saw so that the saw blade could run directly against the fence, but then you have issues with the teeth rubbing against the fence due to the kerf width. I also could have used a consistent thickness of material for the fence, and then made the cheek narrower so that it would ride on the top of the fence instead of on the surface of the material as a depth-stop. The benefit to running the blade directly against the fence is that you don't have to space the fence back to locate the cut. Regardless, this way works. I cut the first slot, then spaced over for the second slot, making sure to cut on the waste side both times.
 I then used a chisel and mallet to remove most of the waste from the slot. After that I finished it with a router plane. I used the spear-point cutter for cross-grain work, even though it wasn't really that important since the rabbet was narrow and the sides were pre-cut.
 At this point the rabbets are cut, but I still haven't cut this long piece of material into individual sides/top/bottom. This is because it's easier to hold a longer piece to the bench without having issues with clamps getting in the way of the router plane. Next I will cut the sides, top and bottom from this material, and then cut the dovetails to join the sides, top and bottom together.
I've decided on the term 'bedside chest' for the piece of furniture I'm making. I think it's reasonably descriptive.
Oh, and I mentioned to a lady at work that I was building it, and she told me that she has one in her daughter's room, so they can't be as rare as my experience would indicate.
Anyway, today I'm starting on the carcase. I have made a few design changes already. The most pertinent is that I will be using web-frames for drawer runners instead of using solid wood. This will be more work, but I don't happen to have enough wood to do solid, and I'm trying to use up what I have, so web-frames it will be.
Regardless of how I choose to support the drawers I will need to cut rabbets to receive the supports. Cutting stopped rabbets is not my idea of a good time, so instead I'm going to cut rabbets all the way across and then add extra pieces to extend the sides, which will stop the rabbets.
Below you can see the material I'm using for the case, with the story-pole lying on top. This material is 3/4" thick by 16" wide laminated southern yellow pine. It comes in 8' lengths and it is cheap like borscht. I think these things cost me less than $20 each. I use them a lot for shop fixtures and such. Since I paint everything it really, really doesn't matter that there are finger-joints here and there. It's a huge time-saver. The first step I'm going to take is to cut the dado for the back to fit in. Since I'm using virtually the entire 8' piece for the two sides, top and bottom of the case, I'm just going to rabbet the whole length in one go.
 And done. The Veritas skew-rabbet plane (it's a moving filister, really) is my new best friend in the shop. I love it. After cutting the dado for the back I mark out the rabbets for the drawer supports. Once they had been marked out I made up a cheek-piece for my back-saw to allow me to cut the sides of the rabbet. Once the sides are cut I will use a router plane to remove the waste. Below we see the 'modified' back-saw lying on the case side that has been laid out for the rabbets. The cheek piece is just a bit of scrap that was planed to the right width to allow for a 1/4" depth of cut.
 More coming soon...

 I then used a chisel and mallet to remove most of the waste from the slot. After that I finished it with a router plane. I used the spear-point cutter for cross-grain work, even though it wasn't really that important since the rabbet was narrow and the sides were pre-cut.