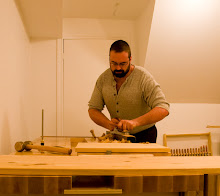
Tuesday, September 30, 2008

Chestnut Sharpener


I know what you're thinking. You're wondering who in their right mind would want to sharpen chestnuts. I wondered the same thing, but wonder no longer! I just got this little dealie here from Lee Valley Tools (and pinched the image from their website). It's a knife sharpener. It's made in Canada (well, the handle is made in Canada and the company manufacturing it is Canadian), it's guaranteed for life, and it works! No, it's not going to put a polished edge on your chip-carving knives, but I had brought home my cable knife from work to try it out. My poor cable knife, used by electricians and me to cut things that really shouldn't be cut with a knife, like copper wire, and doing horrible things like digging plastic out of metal cavities with the tip, was in rather sorry shape. Not hideous shape, because, hey, it's still my knife, but it was rough. I pulled it across this pocket-sized sharpener a few times, and I could shave hairs off of my arm with it. No, not perfectly cleanly in a honed-on-16000-grit-ceramic-and-then-buffed-on-virgin-sheepskin-with-sub-micron-diamond-paste kind of way, but there was shaving going on, and it took less than 5 seconds to do the sharpening, so I was pretty darned impressed. Impressed enough that I'm typing this blog entry instead of going to sleep like I would be doing if I wasn't suffering from temporary insanity over this knife sharpener. I'll have to buy another one to keep at home because this one is going to work with me. Oh, and it cost less than $16. Sweet.

Saturday, September 27, 2008

A Tale of Two Saw Tills - The Beginning

My old saw till works just fine. It didn't end up as quite the saw till that I had originally planned... I had intended it to hold 6 panel or back saws, but I had forgotten about all of the small saws, so in the end I used it for 2 panel saws and 2 back saws, with the small saws mounted on the back. When my two new Medallion saws arrived the old panel saws were relegated to a nail in the dark closet which has become the Purgatory of Unloved Tools. By the time I have my two new Medallion panel saws I must have a reasonably worthy saw till. The old one is simple but effective. The large back holds the small saws in a very visible manner, where they are reasonably easily removed and replaced. The back-saws are even easier to remove and replace. The bottom of the till is a sort of 'bin' that holds dovetail gauges, saw files, and other saw-related things. However, as the bin fills up I worry that I might accidentally (and the thought makes my marrow quake to think upon) scratch the tote of one of my Medallion saws when grabbing a saw file from the bin. This is unacceptable!

The new saw till will be larger, yes, but it will have a drawer into which to shove the various bits and pieces that now fill the bin. The bin will still have some use, but it will have a vertical divider to keep pointy, scratchy things away from the saw totes. At the right in the picture of the current state of the new till we see that the front wall of the bin has a large cutout. This will allow easier access to the contents of the bin, which will be primarily the saw wax and other things that are used very often. The bin will be smaller than it was before, but more accessible, and not prone to harming the saw totes. The drawer, which will be below the front wall of the bin, will hold the majority of the stuff.
The only things that I have done thus far to try to make this till a bit more visually appealing is to add a shallow rabbet and chamfer to the edges of the back, and chamfer the edges of the sides, etc. The rabbet was wonderfully easy to do with the new skew rabbet planes from the good folks at Veritas... at least until I got to the 'stopped' part. These are stopped rabbets, and it was a pain in the butt to clean up the stopped ends. I tried a few different methods to sort it out, but in the end I just pared them with a chisel.
Some of you might have noticed that the back and sides of the till are all vertical grain, but the front is horizontal grain. This may well come back to haunt me. Particularly with the drawer.
So far so good. OOoops.. 6am already... time to get ready for work.

Friday, September 26, 2008

No Rest for the Weary

No rest for the wicked, and the good don't need it. That's what they say. I must not be very good, because I could use a bit of rest. The six-day, sixty-plus hour work weeks are irritating. This week will be a bit of a novelty since it will be a seven-day work week. I haven't added up the hours. Ignorance is bliss. Actually, the long days wouldn't be so bad if I wasn't getting phone calls in the wee hours asking how to fix things at the plant. Two calls last night. No sleep. There but for the grace of my paycheque go I.

I've been trying to work on my saw till.

Right now my saw till holds four saws of back-saw or larger size, with other little saws pinned to the back. Since adding a couple more Medallion back-saws to the collection I've been storing my nasty old panel saws by hanging them on a nail in the store-room. Sub-optimal, at best. Since I have every intention of getting some lovely Medallion panel saws to replace them, I will soon need a bigger saw till.

The plan at first was just to make another like the first, just wider with room for six saws instead of four. Then I decided to make it taller so that it could have a drawer in it.

The existing saw till is just held together with screws.

I cut out a bunch of pieces, then thought maybe I'd try to spiffy it up a bit. Put some sexy joinery in it.

I tried to figure out how I could add joinery given that most of the joins are in the long grain of the wood, not the end grain, and the pieces I've already cut are size-for-size with no extra room for joinery.

I've given up on the idea of sexy joinery. I'll screw it together and be done with it. I am still adding a few embellishments, though, which I need to post about, but not right now... it's after 6:30 and I have to get to work.

Sunday, September 7, 2008

Sharpening. What works for me.

Sharpening blades is a metalworking activity, and metalworking is what I do, and what I'm used to. At first I automatically gravitated towards diamond stones, because that's what I'm used to. I've got a diamond hone that I've had bouncing around in my toolbox for over a decade. Maybe 15 years, now. Still works great.
So when I got into woodworking I bought diamond stones, and used them, and liked them.
Then I needed something finer, so I bought ceramic stones. Again - something I was used to. I didn't want oil stones (which I'm also used to) because of the mess.

Eventually I got tired of hearing about how great water stones are and how they are the One True Path for sharpening, so I bought a few to try them out.

The following is about what I have, and what I actually use.

Firstly, here are my diamond stones. The small one is a roughing stone, 250 grit,
6"x2". It is rarely used.. it's only needed to fix a chip in a chisel or something like that. The larger stone is double-sided with 600 grit on one face and 1200 grit on the other. This is still my most-used stone, and if I had to have just one this would be THE ONE. These are DMT stones with the drilled sharpening plate, obviously. I like these a lot for plane irons and chisels because the swarf (that's the 'metal dust' that is abraded from the object being sharpened) falls into the 'holes' and doesn't cause scratches in the finish. These are not great for small gouges or small knives or anything else that will poke into the holes and get maimed. For that you want a flat, undrilled plate, which DMT makes as well.

Next comes my first polishing stone. This is a ceramic stone.

I like ceramic stones a lot because they cut fast, and will happily do the job with just a touch of lubricant, which can be anything handy. I use mineral spirits as the lubricant for both the diamond stones and the ceramic stones, because it evaporates and won't cause rust.


Here are the water stones. I've got two 1000 grit Nortons, plus an 8000 grit Norton. The reason I got two 1000 grit stones is so I could use Rob Cosman's method of keeping the stones flat. It works.


And here is my current sharpening jig which I use when grinding the bevel. I do
honing by hand, and I'll get to that in a minute, but I like the jig for getting the angle right on the bevel. I use the Veritas Mark II, and I have the cambered roller for lightly cambered blades (smoothing planes).


So what do I actually use? Good question. At first I used the jig on the diamond stones and was happy. The blades weren't really sharp enough at only 1200 grit, but most of the time it was actually just fine. When I needed more sharpness I bought the ceramic 8000 grit stone. It's too small to easily use with the jig, but I used it anyway and it worked.

When I heard the siren call of the water stones I pulled out the VISA card and bought them, took them home, and spent a weekend sharpening everything I owned. At first I liked them. I really did. If you're going to do a serious hours-long sharpening session, they work great. For touch-ups they suck. Why? Mud. They get mud all over everything. It's horrible. And if that wasn't bad enough, I found spots of rust on some of my blades the next day, and also on the bedding surfaces of the planes. I thought I'd wiped them off well enough, but I guess I hadn't. That wasn't a good morning for me. I wasn't happy at all.
At one point I considered using just the 8000 grit water stone, because it doesn't need to be soaked, just spritzed with water. I could use a diamond stone to keep it flat, and just leave the 1000 grit stones in the cupboard. Then I got wise.

I got myself a 'secret weapon'. Yes! Cast a loving eye on this beauty!
What? You expected high-tech? From the hand-tool-only guy? Nope. An elderly Craftsman hand-cranked grinder with a hard felt wheel charged with the green honing compound that Lee Valley sells. Oh, it's... it's just magical. I can take a chisel from the 1200 grit diamond stone, give it a quick hone on the hand grinder, and it is shaving-sharp. I mean, the unwary could shave clear down to the bone in a heartbeat. It's wicked sharp. So once in a blue moon I use the non-rusting-mineral-spirits-lubricated diamond stones with the jig to establish my angles, then I just buff the tool as required on the wheel. No need to remove the wire edge, either... it just 'vanishes'. When it's gone, you're done. You don't touch the back of the blade, you just hone the bevel. This thing works gangbusters for carving knives and whatnot.
Of course, 19 times out of 20 you just need to touch the edge to the wheel again to re-hone it. Re-grinding the bevel is a rare occurrence around here.
I'm considering making a grinder (yes, a powered one) that would have easily replacable wheels so that I could have different firmnesses of felt, or a buffing wheel, or different profiles (for gouges, etc.). I'm still mulling over the design.

In praise of paring

My natural inclination is to hit things with a hammer. It's in my blood. I got into metalworking by way of blacksmithing, so it might be excusable.
This post is not about hitting things with hammers. This post is about using a paring chisel, and it's a process that can be peaceful or poisonous depending on how
well you sharpen your chisel.
Firstly, let's meet my favourite paring chisel.
Normally, a paring chisel has a very long blade to allow more control, a
nd to help to get into places that are far from an edge. My favourite paring chisel is no different, but because it is so wide, and the handle is so long, it looks perfectly in proportion.
Shown are two chisels. The paring chisel, below, doesn't look particularly unusual until you realize that the chisel above is a 1" Hirsch firmer chisel. That would normally be considered a pretty beefy bench chisel. The 1-1/2" Sorby paring chisel dwarfs the Hirsch considerably. The blade on the paring chisel is quite thin, and the bevel is long, with an angle of around 20 degrees.
The chisel is so big, with so much surface for registration against the work, that it is easy to take the cut that you want. It's lovely.
It is paramount that you keep a paring chisel very sharp. Very, very sharp. I'm going to get into sharpening in another posting very soon.

Here is a shot of paring to a straight line. I intentionally stopped short on the hacking cuts because I wanted to leave the 'shavings' (chunks, really) in place so you could see them. Paring need not be delicate. Normally I wouldn't pare right to a line, I'd leave a bit for finishing with a plane or spokeshave. You can't take too thick a section of wood at once or it will split out. If you begin hacking at the far end then what you're paring off is flexible enough that it won't interfere and works just dandy. This was all done just by pushing the chisel. No mallet.

Another shot, this time of paring to a curved line. Same process.


Something that a paring chisel is particularly good at is cleaning up end-grain. If you just push the chisel then you get the same kind of cut that a plane would take, which isn't always optimal. The cut to the right was taken with a straight push, and the shaving is sitting there. The cut is pretty good, but it's a bit 'cheesy' as the old books say. It has the slight voids and general visual texture of sliced, aged cheddar. It looks okay, but it feels a bit rough.

However, there is a cut that the old books call a 'compass cut' which works wonders
on end grain. In this cut you select a point on the chisel, usually about as far back from the tip as the blade is wide, and this will be your axis or swivelling point. You press your thumb hard on this point of the bevel-up blade, and swing the handle back and forth while pushing forward and the net effect is that you get a slicing cut. It's not as fast as a straight push, but it leaves a finish as smooth as glass. You can see in the shot to the left that the left-hand side of the surface, the part done with the compass cut, doesn't reflect light from ragged end-grain the way the right hand side does. It doesn't look hugely different, but it sure feels different. Oh, and I didn't even sharpen the chisel before paring that end-grain. I haven't sharpened this particular chisel since the last time I used it a couple of weeks ago. More on sharpening later.