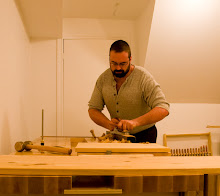
For those of us who want to do a formal layout we have a couple of options - either the ruler or the dividers. I have seen articles and videos suggesting that the way to lay out dovetails is to decide how many tails you want (3, in this example), add one to this number (to get 4), set a ruler diagonally on the piece of wood such that it spans some multiple of the number that you're looking for (in this case 4", but it could be 8", 12cm, 400mm, whatever you want that is divisible by, in this case, 4), then mark the divisions and use a
 square to run the lines to the end of the board (hoping that the end of the board is nice and square so you end up where you think you'll end up... otherwise you have to use a marking gauge of some sort to run the lines down to the end). At this point you will now have the centers of your prospective tails marked, so you use the ruler again to mark the width of the tails and now, at least, you know where the tails are, so you can get your gauge and mark the profiles. And if you have any energy left after all of that then you might be able to saw one or two.
There is an alternative, thankfully.
I learned about this method from a Rob Cosman video, and he attributes it to Alan Peters, and from an interview with Peters it seems that he originated it, though certainly it might have been independently discovered by someone else at some point. Regardless, it's a wonderful method and here it is:
Take two pairs of dividers. Set one pair to be the width you want for your half-pins (about half the thickness of the material, is common). Mark the width of your half pins (one on each side). If you cut tails first then you'll be marking the end-grain of the piece. If you cut tails first (like me) then you'll be marking on the outside face of the piece.

This is one of those things that is really simple, but hard to explain without showing it.
Now we set the second pair of dividers to an arbitrary value that represents the pitch of the joint. The pitch is the width of a tail plus the width of a pin. We lightly step the dividers across the piece, starting in the half-pin mark on one side, and the number of steps that the dividers take between the half-pin marks is the number of tails you would have, and the amount that the dividers over-steps the half-pin mark on the other side is the exposed width of the pin when the joint is assembled. If you're one of those skinny-pin people then you want this space to be tight.
 Above we see a picture that probably should have been zoomed in more. Anyway, the dividers took two steps and then over-shot the right hand half-pin mark by about 1/4". That's a good pin size for my tastes, so I'll walk the dividers over again and push down to leave marks. I'll step it from the left hand half-pin mark, and then from the right hand half-pin mark, so that it leaves two sets of steps as shown below:
That set of marks establishes the layout for the pins (or tails if you had marked the end-grain).
I hope that makes sense. I might need to rewrite this with better pictures.
I just added the following picture that hopefully adds some sense to the above.


3 comments:
It is still confusing even with the added picture.
I get it. The added picture helped. Now all I need is some dividers...
Does it work? On the last picture the left tail is narrower than the right tail...
Post a Comment