skip to main |
skip to sidebar
Now to cut the rabbets. The rabbet locations were all set out directly from the story-pole. The marks were placed on both sides and the marks joined with a straightedge rather than relying on a square to be square. I planed the edge of a piece of scrap to act as a fence for my back-saw. I used a piece of material the same thickness as the cheek on the saw to space the fence out from the line. I could have also put the cheek on the other side of the saw so that the saw blade could run directly against the fence, but then you have issues with the teeth rubbing against the fence due to the kerf width. I also could have used a consistent thickness of material for the fence, and then made the cheek narrower so that it would ride on the top of the fence instead of on the surface of the material as a depth-stop. The benefit to running the blade directly against the fence is that you don't have to space the fence back to locate the cut. Regardless, this way works. I cut the first slot, then spaced over for the second slot, making sure to cut on the waste side both times.
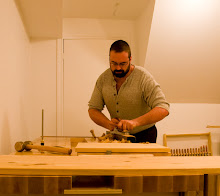
 I then used a chisel and mallet to remove most of the waste from the slot. After that I finished it with a router plane. I used the spear-point cutter for cross-grain work, even though it wasn't really that important since the rabbet was narrow and the sides were pre-cut.
 At this point the rabbets are cut, but I still haven't cut this long piece of material into individual sides/top/bottom. This is because it's easier to hold a longer piece to the bench without having issues with clamps getting in the way of the router plane. Next I will cut the sides, top and bottom from this material, and then cut the dovetails to join the sides, top and bottom together.
I've decided on the term 'bedside chest' for the piece of furniture I'm making. I think it's reasonably descriptive.
Oh, and I mentioned to a lady at work that I was building it, and she told me that she has one in her daughter's room, so they can't be as rare as my experience would indicate.
Anyway, today I'm starting on the carcase. I have made a few design changes already. The most pertinent is that I will be using web-frames for drawer runners instead of using solid wood. This will be more work, but I don't happen to have enough wood to do solid, and I'm trying to use up what I have, so web-frames it will be.
Regardless of how I choose to support the drawers I will need to cut rabbets to receive the supports. Cutting stopped rabbets is not my idea of a good time, so instead I'm going to cut rabbets all the way across and then add extra pieces to extend the sides, which will stop the rabbets.
Below you can see the material I'm using for the case, with the story-pole lying on top. This material is 3/4" thick by 16" wide laminated southern yellow pine. It comes in 8' lengths and it is cheap like borscht. I think these things cost me less than $20 each. I use them a lot for shop fixtures and such. Since I paint everything it really, really doesn't matter that there are finger-joints here and there. It's a huge time-saver. The first step I'm going to take is to cut the dado for the back to fit in. Since I'm using virtually the entire 8' piece for the two sides, top and bottom of the case, I'm just going to rabbet the whole length in one go.
 And done. The Veritas skew-rabbet plane (it's a moving filister, really) is my new best friend in the shop. I love it. After cutting the dado for the back I mark out the rabbets for the drawer supports. Once they had been marked out I made up a cheek-piece for my back-saw to allow me to cut the sides of the rabbet. Once the sides are cut I will use a router plane to remove the waste. Below we see the 'modified' back-saw lying on the case side that has been laid out for the rabbets. The cheek piece is just a bit of scrap that was planed to the right width to allow for a 1/4" depth of cut.
 More coming soon...
Now I must decide how to join the carcase. The standard method in country furniture is to use dovetails to join the casework, then hide the ugly things with moulding. Now, granted that nowadays we see dovetails as being a desireable feature in furniture, but back then it was strictly utilitarian joinery, done for structural reasons only, and hidden away if at all possible. The only ones you could see without trying hard was dovetails in drawers, where it was just too much work to hide them, and when the drawer was closed you couldn't see them, anyway. So this is my current dilemma. Do I dovetail the carcase and add moulding (which I don't really want to do) or do I use the dovetails and leave them exposed with the knowledge that someone would have to be crawling on the floor to see them, and even then they'll be painted and not very prominent. Tough choice. Of course, I could claim it's a Shaker-inspired design and just bang it together with cut nails. :)
Below we see an exploded view of how dovetails would normally be hidden in country furniture. The side and top of the case are dovetailed and then the applied top covers the view from the top and the moulding covers the view from the side. A tall case that was too high to see the top of under normal circumstances wouldn't have an applied top, it would just have tall moulding around the sides. By the way, this is my first real attempt at using SketchUp, so be kind. :)

 A story pole is a narrow piece of material with crucial measurements marked on it in 1:1 scale. You use it as a big ruler. Instead of using a tape measure to measure parts, which involves remembering the dimensions and is a process prone to error, you use the marks on the story pole to directly. No measuring, just comparison. As you can see from looking at the picture of the story-stick on the right you can see the physical construction of the piece in vertical cross-section. If the story-pole is held against a partially complete piece of casework you will be able to verify that the assembly is accurate. Any inaccuracy will be painfully obvious, as will be shown when there is casework to compare to the story pole. You use a rule to produce the story-pole, but inaccuracies in the design show up on the pole.
The design for this bedside dresser was begun with the rough sketch shown in the previous entry, and the design is continued on the story pole. I started by finding a suitable piece of wood. I needed one that was longer than 27", because I had decided on that dimension for the height of the piece. I drew the applied top of the piece on the story pole, then marked 27" below that and drew a baseline. I fleshed out the applied top piece, 3/4" thick (because that's the thickness of the stock that I have) and added the bevel detail. I then drew in the side, though the side 'peters out' near the bottom because the length of it isn't critical because the base overlaps it. I drew the top of the carcase (which is immediately below the applied top) and drew the base. I had decided on 4" tall as the appropriate height of the base, and I wanted the bottom of the carcase to be overlapped a bit to make sure there wouldn't be any cracks showing. This gave me a set location for the top and bottom of the carcase. I grabbed the rule and checked and found that I had 21" between top and bottom. I thought maybe 7" might be okay for the bottom drawer and drew that in, but I didn't like it so I erased that and moved it to 7-1/2". A bit of trial and error got me drawers that are, bottom to top, 7-1/2", 6-1/2", and 5-1/2". These are deep-ish drawers, but I want them to be suitable for clothing, so deep isn't a bad thing, particularly when some depth will be lost to the drawer bottom.
So now the story stick is done in the vertical dimension, and the next step is to flip it over and draw the piece showing the horizontal sizes. Needed will be the top, and indication of the width of the unit, and the width of the base. That's it. Additionally I might throw a detail of the drawer construction on the reverse side, but I haven't even decided whether the drawers will be flush or lipped yet. Right now I'm leaning towards making the drawers with through dovetails then applying faces that will be lipped with a bevel detail similar to the underside of the applied top. Of course, I could change my mind. :) I might build the carcase first and worry about the 'details' later.
 Here's my wood supply at the moment. The nicest stuff is the poplar on the bottom shelf. There is some left-over pine here and there, including some laminated stuff 12" and 16" wide (handy as all get out for painted work)
.
I don't have any heavy stuff except for some odd lumps of maple and oak, not nearly enough to do four legs for a table. So a frame-and-panel project seems to be in my future. Either that or a chest of some sort.
So what do I actually need? A narrow cupboard would be nice, and I can think of a bijillion things to make for the shop, but I should make this a furniture project, so I think the thing that I need the most right now is a bed-side table for the library (which doubles as a guest bedroom). Right now it has a stack of Rubbermaid containers for a side table, which is functional but perhaps a bit too bloke-ish. So a side table it is. Now, if it was just a table then I'd need legs. I could cut legs out of construction 2x4s, but since that room also lacks a dresser maybe it would make sense to make a bedside 'dresser' with three drawers that would serve all of these purposes. Time to scribble.Okay, I think I have something feasible. It doesn't look 'unusual' and yet I can't recall seeing anything quite like it. Surely I must have. It's basically just the pedestal part of a desk, squatting on the floor.
Below is the result of my scribbling.
 Several elements are left open. I haven't decided how to finish the drawer face edges, and I haven't nailed down the choice for the base. The scrolly-looking Quebec Provincial style doesn't match the simple chamfered top, so that's out. I think I like the plain base best, so far. It might depend somewhat on what I end up doing with the drawer edges.
The pulls I think I have narrowed down. I don't like the hardware pulls of most furniture styles. My personal taste is largely colonial, but I don't like drop pulls. I prefer craftsman or shaker wooden pulls. A single, chunky pull in the center of each drawer will be the most practical, and will look good to me. Usually when I'm working on a project I make it up as I go along, but this one is complicated enough that I'm going to make up a story-stick before I start cutting up material. More on this later.

 I then used a chisel and mallet to remove most of the waste from the slot. After that I finished it with a router plane. I used the spear-point cutter for cross-grain work, even though it wasn't really that important since the rabbet was narrow and the sides were pre-cut.