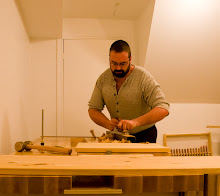
Ripping boards to width should not be a task that makes terribly great demands on the skill of the sawyer.
Famous last words, eh?
Ripping requires more brawn than brain, in general, but a point was driven home for me last evening that I'd like to pass on.
I've seen several videos where people mention how much they prefer to rip smaller pieces of stock vertically in the vise rather than horizontally on the horses. I can understand this from an ergonomic perspective. Totally. There is, however, a potential problem. The potential problem is caused by the angle of attack. Look at the image below:
Here we see my rip saw buried in a piece of cribbing (the hardwood 4x4s of uncertain parentage that are used on big flat-bed trucks to keep ugly pieces of material being shipped from tearing up the deck of the truck). The saw is horizontal. I can merrily saw away in this position, but the saw will go in whatever direction the saw is going. With the saw perpendicular to the work, controlling the saw - changing its direction - is very, very difficult. To change the direction of the saw I would need to tip the handle down until the saw meets the work at about a 45 degree angle. This means that to get the angle you need to control the saw when sawing in the vise you need to have the work sticking out far enough that it's liable to chatter. Either that or you'll be on your knees doing the sawing. I got lucky on this particular cut and it was dead-nuts from the beginning, so I just kept the saw horizontal and it followed the line like I was paying it money to do so. That was the first of two rips. I cut that 4x4 down to make a 4x3 and a 1x4, then I cut a 1x1 out of the 1x4, and on that cut I screwed up the line twice (both ends). I had to take the board out of the vise and cut it on the sawhorses where I could angle the saw down to a 45 degree angle relative to the work, at which point controlling the saw was easy. I got it back to the line, sawed a few more inches to establish the direction, then I put the board back in the vise and it was smooth sailing from there.
Something to remember - with a well-tuned saw that cuts straight, using it perpendicular to the workpiece is 'cruise control' - it just stays on the line it's on. Angling it down allows you to change the direction.
M.Mike
Showing posts with label Hand Saws. Show all posts
Saturday, July 11, 2015
Sunday, May 3, 2009
New Medallion saws
These are my two new Medallion hand saws that followed me home recently. The bottom one is a five-point rip saw, breasted, with progressive rake. Lovely saw. The blade is ground for minimal set. The tote, shown below, is of a figured apple wood, and has plenty of real estate for a good two-handed grip for heavy ripping.
The other saw is an eight-point cross-cut saw with a caramelized birds-eye maple tote. Just lovely. This saw is also ground. It cuts like a laser, but like a fine dovetail saw you only get one chance to get your line right on the cut. It's not easy to correct the cut once it has been started. Of course, this is only a problem when cutting joinery where you're cutting with the line of the saw teeth perpendicular to the face of the board. If you're cross-cutting normally where you have the teeth at a 45 degree angle to the face of the board it's no problem to keep it in line. In the photo below, note the nib on the rip saw below the cross-cut tote. Both saws have nibs. :)
Sunday, November 30, 2008
Tool Technology
The recent release of Lee Valley Tools' new Veritas Dovetail Saw has caused some consternation on the hand tool forum I frequent, and the OldTools mailing list.
I can understand the initial scepticism, as the design is quite different from a traditional western dovetail saw. See below, in this image from their website, used without permission, but I'm willing to risk it since I've been a customer for over 20 years.
Anyway, that's not really what a traditional dovetail saw looks like. Not at first glance. If you spend a bit of time looking at it then it actually gets more reasonable. It's still a pistol-grip backed dovetail saw with 14 tpi. Pretty normal, that. What's not normal is the material the back (or spine) is made from, and the way the tote (handle) is mounted to the saw.
Instead of a traditional brass back the saw has an injection molded composite back which Veritas says has glass fibres added for strength and rigidity, and stainless steel powder added to increase weight.
Instead of having a large tote that bolts right onto the blade, it actually bolts onto the spine. A traditional saw uses the blade as the primary structural element - the brass back attatches to the blade, and the tote attatches to the blade. This saw uses the spine as the primary structural element. The blade and tote attach to the spine.
Injection molding is a very efficient manufacturing method for producing parts with consistent tolerances, so if the molds are made properly the saws will be very consistent with few quality problems in terms of misaligned blades, etc.
This efficiency has left the saw with a very attractive price of only $65 Canadian. This puts it in the price range of decent Japanese dovetail saws.
I have several reasons for being fond of the manufacturing process... I used to build the type of grinders used to make the stainless powder for the spine, and I now work in the plastics industry.
So will I buy one of these saws?
Probably not. I'm quite happy with my traditional saws, but they cost a lot more than $65 each, hand-made by Ed Paik at Medallion Toolworks in Oakville. The hand-made approach allowed me to get a custom saw that is 2" longer than traditional, and almost an inch deeper. I wanted a big saw, and I was able to get that from Ed. I wouldn't be able to get that from Lee Valley Tools, and that's just fine because I'm not their target buyer.
I think the target buyer for this saw is a power-tool user or new hand-tool user who wants to try dovetails or other hand joinery, but doesn't want to have to pay a great deal for a new, premium-make dovetail saw, and doesn't want to buy a garage-sale reject and learn how to fettle it, sharpen it, and generally make it work. You might have seen my entry about this process in "New Life for Old Saw". Keep in mind that in that entry all I did was fix the teeth. I didn't bother cleaning the rust off of the blade, etc. Anyway, fixing such a saw is by far the cheapest way to get a decent dovetail saw, but saw sharpening is a new skill to learn, and not everybody has a saw vise, so then you'd have to buy or make one of those as well. So fixing an old saw isn't for everyone. Buying a new saw is fraught with peril because the known good brands of western saws are expensive. This might lead some to pick a Japanese saw on price alone. Now there is a western alternative in a similar price range, and I think that's great.
Those who have tried the saw claim that it works very well.
I can understand the initial scepticism, as the design is quite different from a traditional western dovetail saw. See below, in this image from their website, used without permission, but I'm willing to risk it since I've been a customer for over 20 years.
Instead of a traditional brass back the saw has an injection molded composite back which Veritas says has glass fibres added for strength and rigidity, and stainless steel powder added to increase weight.
Instead of having a large tote that bolts right onto the blade, it actually bolts onto the spine. A traditional saw uses the blade as the primary structural element - the brass back attatches to the blade, and the tote attatches to the blade. This saw uses the spine as the primary structural element. The blade and tote attach to the spine.
Injection molding is a very efficient manufacturing method for producing parts with consistent tolerances, so if the molds are made properly the saws will be very consistent with few quality problems in terms of misaligned blades, etc.
This efficiency has left the saw with a very attractive price of only $65 Canadian. This puts it in the price range of decent Japanese dovetail saws.
I have several reasons for being fond of the manufacturing process... I used to build the type of grinders used to make the stainless powder for the spine, and I now work in the plastics industry.
So will I buy one of these saws?
Probably not. I'm quite happy with my traditional saws, but they cost a lot more than $65 each, hand-made by Ed Paik at Medallion Toolworks in Oakville. The hand-made approach allowed me to get a custom saw that is 2" longer than traditional, and almost an inch deeper. I wanted a big saw, and I was able to get that from Ed. I wouldn't be able to get that from Lee Valley Tools, and that's just fine because I'm not their target buyer.
I think the target buyer for this saw is a power-tool user or new hand-tool user who wants to try dovetails or other hand joinery, but doesn't want to have to pay a great deal for a new, premium-make dovetail saw, and doesn't want to buy a garage-sale reject and learn how to fettle it, sharpen it, and generally make it work. You might have seen my entry about this process in "New Life for Old Saw". Keep in mind that in that entry all I did was fix the teeth. I didn't bother cleaning the rust off of the blade, etc. Anyway, fixing such a saw is by far the cheapest way to get a decent dovetail saw, but saw sharpening is a new skill to learn, and not everybody has a saw vise, so then you'd have to buy or make one of those as well. So fixing an old saw isn't for everyone. Buying a new saw is fraught with peril because the known good brands of western saws are expensive. This might lead some to pick a Japanese saw on price alone. Now there is a western alternative in a similar price range, and I think that's great.
Those who have tried the saw claim that it works very well.
Saturday, September 27, 2008
A Tale of Two Saw Tills - The Beginning
My old saw till works just fine. It didn't end up as quite the saw till that I had originally planned... I had intended it to hold 6 panel or back saws, but I ha
d forgotten about all of the small saws, so in the end I used it for 2 panel saws and 2 back saws, with the small saws mounted on the back. When my two new Medallion saws arrived the old panel saws were relegated to a nail in the dark closet which has become the Purgatory of Unloved Tools. By the time I have my two new Medallion panel saws I must have a reasonably worthy saw till. The old one is simple but effective. The large back holds the small saws in a very visible manner, where they are reasonably easily removed and replaced. The back-saws are even easier to remove and replace. The bottom of the till is a sort of 'bin' that holds dovetail gauges, saw files, and other saw-related things. However, as the bin fills up I worry that I might accidentally (and the thought makes my marrow quake to think upon) scratch the tote of one of my Medallion saws when grabbing a saw
file from the bin. This is unacceptable!
The new saw till will be larger, yes, but it will have a drawer into which to shove the various bits and pieces that now fill the bin. The bin will still have some use, but it will have a vertical divider to keep pointy, scratchy things away from the saw totes. At the right in the picture of the current state of the new till we see that the front wall of the bin has a large cutout. This will allow easier access to the contents of the bin, which will be primarily the saw wax and other things that are used very often. The bin will be smaller than it was before, but more accessible, and not prone to harming the saw totes. The drawer, which will be below the front wall of the bin, will hold the majority of the stuff.
The only things that I have done thus far to try to make this till a bit more visually appealing is to add a shallow rabbet and chamfer to the edges of the back, and chamfer the edges of the sides, etc. The rabbet was wonderfully easy to do with the new skew rabbet planes from the good folks at Veritas... at least until I got to the 'stopped' part. These are stopped rabbets, and it was a pain in the butt to clean up the stopped ends. I tried a few different methods to sort it out, but in the end I just pared them with a chisel.
Some of you might have noticed that the back and sides of the till are all vertical grain, but the front is horizontal grain. This may well come back to haunt me. Particularly with the drawer.
So far so good. OOoops.. 6am already... time to get ready for work.
d forgotten about all of the small saws, so in the end I used it for 2 panel saws and 2 back saws, with the small saws mounted on the back. When my two new Medallion saws arrived the old panel saws were relegated to a nail in the dark closet which has become the Purgatory of Unloved Tools. By the time I have my two new Medallion panel saws I must have a reasonably worthy saw till. The old one is simple but effective. The large back holds the small saws in a very visible manner, where they are reasonably easily removed and replaced. The back-saws are even easier to remove and replace. The bottom of the till is a sort of 'bin' that holds dovetail gauges, saw files, and other saw-related things. However, as the bin fills up I worry that I might accidentally (and the thought makes my marrow quake to think upon) scratch the tote of one of my Medallion saws when grabbing a saw
file from the bin. This is unacceptable!The new saw till will be larger, yes, but it will have a drawer into which to shove the various bits and pieces that now fill the bin. The bin will still have some use, but it will have a vertical divider to keep pointy, scratchy things away from the saw totes. At the right in the picture of the current state of the new till we see that the front wall of the bin has a large cutout. This will allow easier access to the contents of the bin, which will be primarily the saw wax and other things that are used very often. The bin will be smaller than it was before, but more accessible, and not prone to harming the saw totes. The drawer, which will be below the front wall of the bin, will hold the majority of the stuff.
The only things that I have done thus far to try to make this till a bit more visually appealing is to add a shallow rabbet and chamfer to the edges of the back, and chamfer the edges of the sides, etc. The rabbet was wonderfully easy to do with the new skew rabbet planes from the good folks at Veritas... at least until I got to the 'stopped' part. These are stopped rabbets, and it was a pain in the butt to clean up the stopped ends. I tried a few different methods to sort it out, but in the end I just pared them with a chisel.
Some of you might have noticed that the back and sides of the till are all vertical grain, but the front is horizontal grain. This may well come back to haunt me. Particularly with the drawer.
So far so good. OOoops.. 6am already... time to get ready for work.
Sunday, July 6, 2008
Saw Till
Now that I have some saws worth having (Medallion Tools... nice...) and more on the way, it was time to build a saw till. My needs are relatively meagre compared to a serious saw aficionado, so I went with a relatively meagre saw till. Still, it stores all of my saws, so far, and also stores all of my saw sharpening gear and other 'saw oriented' stuff.
Right now I'm light on cross-cut saws. I have two on order from Medallion, but it takes a while. I have my saws made with light coloured steamed-beech totes if they're a rip pattern saw, and dark totes (some weird carmelized maple) if they're a crosscut saw. It keeps me from grabbing the wrong saw as easily.
At the top left of the rack is a Veritas 'dovetail saw'. It came packaged with a magnetic dovetail guide that I got as a gift. It actually has its moments. Moving clockwise, next comes the legendary Rip Tooth Dozuki from Lee Valley Tools. Great little saw, but after trying them, I'm not so happy with pull-saws, and I'm going back to push-saws. Next is a somewhat generic 'gent's saw' which I rarely use. My big rip saw is a Disston, but not old enough to be particularly good. It works. The cross-cut panel saw is also a Disston. Same comment. It works, but I'm looking forward to replacing it. Next is my Medallion Tenon Saw. Nice... and my custom big-ass Medallion Dovetail Saw with a 12" blade and 2.5" depth of cut below the back. Ooooh baby. Lotsa beef, there. Fab on hardwood. Grabby on pine. It's worth it. Oh, and last but not least is the Kugihiki from Lee Valley tools. It's a flush-cut saw, and a pull-saw is better for that particular application. It's a great saw, particularly for the price. "Woodworking" Magazine did a comparison between several brands of flush-cutting saw and this one won. Colour me smug. :)
Past the saw till is the clamp rack for the gluing clamps. Those are the Lee Valley 30th anniversary aluminum clamps. Not fabulous clamps, but an excellent deal.
Right now I'm light on cross-cut saws. I have two on order from Medallion, but it takes a while. I have my saws made with light coloured steamed-beech totes if they're a rip pattern saw, and dark totes (some weird carmelized maple) if they're a crosscut saw. It keeps me from grabbing the wrong saw as easily.
At the top left of the rack is a Veritas 'dovetail saw'. It came packaged with a magnetic dovetail guide that I got as a gift. It actually has its moments. Moving clockwise, next comes the legendary Rip Tooth Dozuki from Lee Valley Tools. Great little saw, but after trying them, I'm not so happy with pull-saws, and I'm going back to push-saws. Next is a somewhat generic 'gent's saw' which I rarely use. My big rip saw is a Disston, but not old enough to be particularly good. It works. The cross-cut panel saw is also a Disston. Same comment. It works, but I'm looking forward to replacing it. Next is my Medallion Tenon Saw. Nice... and my custom big-ass Medallion Dovetail Saw with a 12" blade and 2.5" depth of cut below the back. Ooooh baby. Lotsa beef, there. Fab on hardwood. Grabby on pine. It's worth it. Oh, and last but not least is the Kugihiki from Lee Valley tools. It's a flush-cut saw, and a pull-saw is better for that particular application. It's a great saw, particularly for the price. "Woodworking" Magazine did a comparison between several brands of flush-cutting saw and this one won. Colour me smug. :)Past the saw till is the clamp rack for the gluing clamps. Those are the Lee Valley 30th anniversary aluminum clamps. Not fabulous clamps, but an excellent deal.
Labels:
Hand Saws,
Hand Tools,
Shop,
Tool Storage
Subscribe to:
Posts (Atom)