skip to main |
skip to sidebar
Now to cut the rabbets. The rabbet locations were all set out directly from the story-pole. The marks were placed on both sides and the marks joined with a straightedge rather than relying on a square to be square. I planed the edge of a piece of scrap to act as a fence for my back-saw. I used a piece of material the same thickness as the cheek on the saw to space the fence out from the line. I could have also put the cheek on the other side of the saw so that the saw blade could run directly against the fence, but then you have issues with the teeth rubbing against the fence due to the kerf width. I also could have used a consistent thickness of material for the fence, and then made the cheek narrower so that it would ride on the top of the fence instead of on the surface of the material as a depth-stop. The benefit to running the blade directly against the fence is that you don't have to space the fence back to locate the cut. Regardless, this way works. I cut the first slot, then spaced over for the second slot, making sure to cut on the waste side both times.
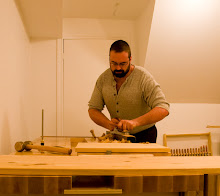
 I then used a chisel and mallet to remove most of the waste from the slot. After that I finished it with a router plane. I used the spear-point cutter for cross-grain work, even though it wasn't really that important since the rabbet was narrow and the sides were pre-cut.
 At this point the rabbets are cut, but I still haven't cut this long piece of material into individual sides/top/bottom. This is because it's easier to hold a longer piece to the bench without having issues with clamps getting in the way of the router plane. Next I will cut the sides, top and bottom from this material, and then cut the dovetails to join the sides, top and bottom together.
The current push in dovetail saws is for the narrowest kerf you can get away with. My dovetail saw has four thousandths of an inch of set, which is a hair less than the thickness of a sheet of copy paper. That's not a lot.
Reworking the Crappy Crown Gent's Saw got me thinking about kerf because when I finished filing it the first time the kerf was still far too wide, I thought.
I did the test cut and the cut was fast, effortless and straight, but it was wider than I wanted.
Now I'm wondering about the effect of kerf on joinery.
Where you have two cuts forming an angle of significantly less than 90 degrees, a wide kerf will give you a poor corner. Either you will have a groove in one kerf wall, or you will have a slightly rounded inside corner. The narrower the kerf the less effect there is.
However, when doing something like a dovetail, the wider the kerf the easier it is to release the waste when chopping it out. The waste won't wedge as easily - you have more room for the chisel.
When cutting in general, the less kerf you have the harder it is to steer the saw, however having too much kerf is a poor choice, as you need to expend too much energy keeping the saw cutting straight.
The minimum amount of kerf is dependant on the wood being sawed, the depth of the saw blade, and desired radius of cut, when cutting curves. Green softwood requires a great deal more kerf than dry hardwood, a panel saw requires more kerf than a bow saw, and a turning saw requires more kerf than a dovetail saw.
I don't know if there is a magical formula out there where you can punch in your requirements and it tells you the proper kerf to use. I suspect most manufacturers just use traditional values as a basis point and modify it as required.
More mulling on this matter is required, but I'm starting to wonder if striving for the narrowest kerf is the correct path.
Dovetail angles are often described by the ratio of rise to run. Historically, in the western tradition, dovetails would be made with an angle of 1:6 for softwood, and 1:8 for hardwood. This equates to about 9.5 degrees and 7.1 degrees from normal to the end of the board, or basically 9.5 or 7.1 degrees away from being a finger joint instead of a dovetail. Some people feel that the easiest way to get by in the dovetailing world is to use 1:7 on all material as a compromise. This equates to an angle of about 8.1 degrees.My question, of course, is who cares? We're talking about less than two and a half degrees difference between the whole range of them. Who is going to be able to tell what ratio you used when looked at from any kind of a distance. A person with a good eye might be able to guess, but you'd need to take a gauge to the piece to be sure, and anyone who takes a gauge to anything I made deserves whatever disappointment might be forthcoming. :)So what do I use? I use the 1:6 ratio for all woods. I figure if it's going to be a dovetail then I might as well pick the one that looks the most like a dovetail.
Below we see a quickly cobbled dovetail that I just did this morning for the sake of illustrating this point. This joint has two tails. One is at 1:6 and one is at 1:8. Even right side by side and zoomed in it's not that obvious that they're different angles. At most you might think that it was a minor variation caused by hand-cut joinery. Certainly it wouldn't scream at you from across the room. So I, for one, don't get all excited about dovetail angles. Frank Klaus, master cabinetmaker and father of dovetail excitement on this continent, doesn't use a gauge. He eyeballs the angles. He doesn't even measure out the spacing. He eyeballs everything except the depth of the cut (which must match the thickness of the board being joined to). Despite his carefree methodology, his experience is legendary and he can cut seemingly air-tight dovetails in the time it takes most experts to do the layout.
 There are a whole bunch of different dovetail gauges on the market. I've bought a few, and made a couple, and these are what I have left. At the right in the image above is an adjustable bevel. This is the traditional way in many western cultures to gauge your dovetail angle. You set the bevel to the angle you want, then use it to mark the work. This works, but the adjustable bevel is relatively heavy, and the angle could creep when you set the gauge down and pick it up again for the next board, etc. The adjustability can be a drawback. The next gauges, moving to the left in the image above, are the Veritas Dovetail Markers. Very inexpensive, very light, generally inoffensive, but they lack an important feature, and that is being able to mark the angle and the square line on the adjacent face with the same tool and placement. It is a great luxury to be able to set the gauge in place and mark both lines without moving the gauge, thereby guaranteeing that the marked lines are in the same plane. The lack of this ability is a failing of the adjustable bevel, as well. At the far left in the above image we see a dovetail gauge that I made. I'd seen a gauge in Ernest Joyce's "Encyclopedia of Cabinetmaking" which I thought was almost perfect. It was a double-sided affair that had two angles on it, so that one gauge could be used for hardwoods and softwoods. Rob Cosman found the same image, and uses it, (and sells them) himself. I didn't like that it had two angles on it. It wouldn't take that much inattention to pick up the gauge and use the wrong side. Also, you had to flip the gauge over to change the direction of the angle when you're marking the other side of a dovetail. I would prefer to have one gauge for each angle that I'm likely to use. The first one I made was like Joyce's original, but I soon started modifying it, then started over when I realized that the two-angle design wasn't good for me. To this end I made mine with only one angle, but both edges have the same angle so it can do both sides of the dovetail by just sliding it back and forth. No flipping and flopping, and no chance of using the 'wrong' angle. This was the best gauge so far, and in some ways is still my best gauge.
The last is the best commercial gauge I have. After using my wooden gauge for some time I discovered the Veritas Dovetail Saddle Marker. it is a commercial version of mine. I guess great minds think alike. :) It has all of the features of mine, and is larger. What makes mine still a bit better is that it is much lighter, and warmer in the hand (being wood instead of metal). If you want to buy a commercial dovetail gauge, I think your best bet is the Veritas Dovetail Saddle Markers.
As to which angle to use? Well that is a discussion for another day...

 I then used a chisel and mallet to remove most of the waste from the slot. After that I finished it with a router plane. I used the spear-point cutter for cross-grain work, even though it wasn't really that important since the rabbet was narrow and the sides were pre-cut.