skip to main |
skip to sidebar
 A story pole is a narrow piece of material with crucial measurements marked on it in 1:1 scale. You use it as a big ruler. Instead of using a tape measure to measure parts, which involves remembering the dimensions and is a process prone to error, you use the marks on the story pole to directly. No measuring, just comparison. As you can see from looking at the picture of the story-stick on the right you can see the physical construction of the piece in vertical cross-section. If the story-pole is held against a partially complete piece of casework you will be able to verify that the assembly is accurate. Any inaccuracy will be painfully obvious, as will be shown when there is casework to compare to the story pole. You use a rule to produce the story-pole, but inaccuracies in the design show up on the pole.
The design for this bedside dresser was begun with the rough sketch shown in the previous entry, and the design is continued on the story pole. I started by finding a suitable piece of wood. I needed one that was longer than 27", because I had decided on that dimension for the height of the piece. I drew the applied top of the piece on the story pole, then marked 27" below that and drew a baseline. I fleshed out the applied top piece, 3/4" thick (because that's the thickness of the stock that I have) and added the bevel detail. I then drew in the side, though the side 'peters out' near the bottom because the length of it isn't critical because the base overlaps it. I drew the top of the carcase (which is immediately below the applied top) and drew the base. I had decided on 4" tall as the appropriate height of the base, and I wanted the bottom of the carcase to be overlapped a bit to make sure there wouldn't be any cracks showing. This gave me a set location for the top and bottom of the carcase. I grabbed the rule and checked and found that I had 21" between top and bottom. I thought maybe 7" might be okay for the bottom drawer and drew that in, but I didn't like it so I erased that and moved it to 7-1/2". A bit of trial and error got me drawers that are, bottom to top, 7-1/2", 6-1/2", and 5-1/2". These are deep-ish drawers, but I want them to be suitable for clothing, so deep isn't a bad thing, particularly when some depth will be lost to the drawer bottom.
So now the story stick is done in the vertical dimension, and the next step is to flip it over and draw the piece showing the horizontal sizes. Needed will be the top, and indication of the width of the unit, and the width of the base. That's it. Additionally I might throw a detail of the drawer construction on the reverse side, but I haven't even decided whether the drawers will be flush or lipped yet. Right now I'm leaning towards making the drawers with through dovetails then applying faces that will be lipped with a bevel detail similar to the underside of the applied top. Of course, I could change my mind. :) I might build the carcase first and worry about the 'details' later.
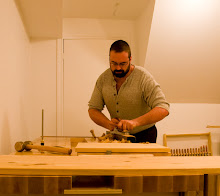
 Here's my wood supply at the moment. The nicest stuff is the poplar on the bottom shelf. There is some left-over pine here and there, including some laminated stuff 12" and 16" wide (handy as all get out for painted work)
.
I don't have any heavy stuff except for some odd lumps of maple and oak, not nearly enough to do four legs for a table. So a frame-and-panel project seems to be in my future. Either that or a chest of some sort.
So what do I actually need? A narrow cupboard would be nice, and I can think of a bijillion things to make for the shop, but I should make this a furniture project, so I think the thing that I need the most right now is a bed-side table for the library (which doubles as a guest bedroom). Right now it has a stack of Rubbermaid containers for a side table, which is functional but perhaps a bit too bloke-ish. So a side table it is. Now, if it was just a table then I'd need legs. I could cut legs out of construction 2x4s, but since that room also lacks a dresser maybe it would make sense to make a bedside 'dresser' with three drawers that would serve all of these purposes. Time to scribble.Okay, I think I have something feasible. It doesn't look 'unusual' and yet I can't recall seeing anything quite like it. Surely I must have. It's basically just the pedestal part of a desk, squatting on the floor.
Below is the result of my scribbling.
 Several elements are left open. I haven't decided how to finish the drawer face edges, and I haven't nailed down the choice for the base. The scrolly-looking Quebec Provincial style doesn't match the simple chamfered top, so that's out. I think I like the plain base best, so far. It might depend somewhat on what I end up doing with the drawer edges.
The pulls I think I have narrowed down. I don't like the hardware pulls of most furniture styles. My personal taste is largely colonial, but I don't like drop pulls. I prefer craftsman or shaker wooden pulls. A single, chunky pull in the center of each drawer will be the most practical, and will look good to me. Usually when I'm working on a project I make it up as I go along, but this one is complicated enough that I'm going to make up a story-stick before I start cutting up material. More on this later.
I can't say that I've been too busy to post. Well, I could, but I'd be lying. Instead, I've been too lazy to post. The less I have to do, the less I want to do it.
I just finished a small project. A shelf. Not a big, opulent, dovetailed black-walnut shelf, but a humble, painted pine practical shelf that blends into the wall and quietly does the job of holding my keys when I walk in the door. I should have taken pictures, and done up something special to make up for my woeful lack of energy in maintaining this blog. I didn't. So, for penance I'm going to start a larger project, and document it thoroughly. It will also be a painted project, though I'll likely add some poplar into the mix. Maybe a side-table. I'll mull it over and post back soon. Honest!

The recent release of Lee Valley Tools' new Veritas Dovetail Saw has caused some consternation on the hand tool forum I frequent, and the OldTools mailing list.
I can understand the initial scepticism, as the design is quite different from a traditional western dovetail saw. See below, in this image from their website, used without permission, but I'm willing to risk it since I've been a customer for over 20 years. Anyway, that's not really what a traditional dovetail saw looks like. Not at first glance. If you spend a bit of time looking at it then it actually gets more reasonable. It's still a pistol-grip backed dovetail saw with 14 tpi. Pretty normal, that. What's not normal is the material the back (or spine) is made from, and the way the tote (handle) is mounted to the saw.
Instead of a traditional brass back the saw has an injection molded composite back which Veritas says has glass fibres added for strength and rigidity, and stainless steel powder added to increase weight.
Instead of having a large tote that bolts right onto the blade, it actually bolts onto the spine. A traditional saw uses the blade as the primary structural element - the brass back attatches to the blade, and the tote attatches to the blade. This saw uses the spine as the primary structural element. The blade and tote attach to the spine.
Injection molding is a very efficient manufacturing method for producing parts with consistent tolerances, so if the molds are made properly the saws will be very consistent with few quality problems in terms of misaligned blades, etc.
This efficiency has left the saw with a very attractive price of only $65 Canadian. This puts it in the price range of decent Japanese dovetail saws.
I have several reasons for being fond of the manufacturing process... I used to build the type of grinders used to make the stainless powder for the spine, and I now work in the plastics industry.
So will I buy one of these saws?
Probably not. I'm quite happy with my traditional saws, but they cost a lot more than $65 each, hand-made by Ed Paik at Medallion Toolworks in Oakville. The hand-made approach allowed me to get a custom saw that is 2" longer than traditional, and almost an inch deeper. I wanted a big saw, and I was able to get that from Ed. I wouldn't be able to get that from Lee Valley Tools, and that's just fine because I'm not their target buyer.
I think the target buyer for this saw is a power-tool user or new hand-tool user who wants to try dovetails or other hand joinery, but doesn't want to have to pay a great deal for a new, premium-make dovetail saw, and doesn't want to buy a garage-sale reject and learn how to fettle it, sharpen it, and generally make it work. You might have seen my entry about this process in "New Life for Old Saw". Keep in mind that in that entry all I did was fix the teeth. I didn't bother cleaning the rust off of the blade, etc. Anyway, fixing such a saw is by far the cheapest way to get a decent dovetail saw, but saw sharpening is a new skill to learn, and not everybody has a saw vise, so then you'd have to buy or make one of those as well. So fixing an old saw isn't for everyone. Buying a new saw is fraught with peril because the known good brands of western saws are expensive. This might lead some to pick a Japanese saw on price alone. Now there is a western alternative in a similar price range, and I think that's great.
Those who have tried the saw claim that it works very well.
I have a dirty little secret that woodworking videos put me to sleep. I have to watch them a few times to get all of the information in between naps. I love them, and keep buying them, but they put me out.
My all-time favourite cure for insomnia had been Rob Cosman's "Rough to Ready" wherein we get to spend an hour watching him plane one board. Little did I know that I hadn't seen anything yet.
I bought the video "Sharpening Woodturning Tools" by Mike Darlow. Oh boy.
First let me say that there is excellent information in there. His is the very first woodworking-oriented sharpening... thing... that mentions that you should never quench high-speed steel. This is something that machinists and metallurgists have known for almost 100 years, but woodworkers who use a bench grinder seem to be addicted to dunking their tools in water every 10 seconds as they're grinding them. You should never do this to high-speed steel as it will develop micro-cracks and you'll be just begging for a future fracture. Feel free to quench your regular carbon steel, but never quench HSS. Anyway, lots of info. TONS of info. Almost THREE HOURS of info. It's going to take me a week to see it all, between naps, but I'm glad I bought it. It covers every jig I've ever heard of, and sharpening every common lathe tool, though not hook tools or other esoterics... at least, not that I've been awake for so far. :)
The production quality is not professional, but it gets the point across.