Wednesday, December 31, 2008
The Story of the Pole
A story pole is a narrow piece of material with crucial measurements marked on it in 1:1 scale. You use it as a big ruler. Instead of using a tape measure to measure parts, which involves remembering the dimensions and is a process prone to error, you use the marks on the story pole to directly. No measuring, just comparison. As you can see from looking at the picture of the story-stick on the right you can see the physical construction of the piece in vertical cross-section. If the story-pole is held against a partially complete piece of casework you will be able to verify that the assembly is accurate. Any inaccuracy will be painfully obvious, as will be shown when there is casework to compare to the story pole. You use a rule to produce the story-pole, but inaccuracies in the design show up on the pole.
The design for this bedside dresser was begun with the rough sketch shown in the previous entry, and the design is continued on the story pole. I started by finding a suitable piece of wood. I needed one that was longer than 27", because I had decided on that dimension for the height of the piece. I drew the applied top of the piece on the story pole, then marked 27" below that and drew a baseline. I fleshed out the applied top piece, 3/4" thick (because that's the thickness of the stock that I have) and added the bevel detail. I then drew in the side, though the side 'peters out' near the bottom because the length of it isn't critical because the base overlaps it. I drew the top of the carcase (which is immediately below the applied top) and drew the base. I had decided on 4" tall as the appropriate height of the base, and I wanted the bottom of the carcase to be overlapped a bit to make sure there wouldn't be any cracks showing. This gave me a set location for the top and bottom of the carcase. I grabbed the rule and checked and found that I had 21" between top and bottom. I thought maybe 7" might be okay for the bottom drawer and drew that in, but I didn't like it so I erased that and moved it to 7-1/2". A bit of trial and error got me drawers that are, bottom to top, 7-1/2", 6-1/2", and 5-1/2". These are deep-ish drawers, but I want them to be suitable for clothing, so deep isn't a bad thing, particularly when some depth will be lost to the drawer bottom.
So now the story stick is done in the vertical dimension, and the next step is to flip it over and draw the piece showing the horizontal sizes. Needed will be the top, and indication of the width of the unit, and the width of the base. That's it. Additionally I might throw a detail of the drawer construction on the reverse side, but I haven't even decided whether the drawers will be flush or lipped yet. Right now I'm leaning towards making the drawers with through dovetails then applying faces that will be lipped with a bevel detail similar to the underside of the applied top. Of course, I could change my mind. :) I might build the carcase first and worry about the 'details' later.
Picking a Project
Here's my wood supply at the moment. The nicest stuff is the poplar on the bottom shelf. There is some left-over pine here and there, including some laminated stuff 12" and 16" wide (handy as all get out for painted work). I don't have any heavy stuff except for some odd lumps of maple and oak, not nearly enough to do four legs for a table. So a frame-and-panel project seems to be in my future. Either that or a chest of some sort.
So what do I actually need? A narrow cupboard would be nice, and I can think of a bijillion things to make for the shop, but I should make this a furniture project, so I think the thing that I need the most right now is a bed-side table for the library (which doubles as a guest bedroom). Right now it has a stack of Rubbermaid containers for a side table, which is functional but perhaps a bit too bloke-ish. So a side table it is. Now, if it was just a table then I'd need legs. I could cut legs out of construction 2x4s, but since that room also lacks a dresser maybe it would make sense to make a bedside 'dresser' with three drawers that would serve all of these purposes. Time to scribble.
Okay, I think I have something feasible. It doesn't look 'unusual' and yet I can't recall seeing anything quite like it. Surely I must have. It's basically just the pedestal part of a desk, squatting on the floor.
Below is the result of my scribbling.
Several elements are left open. I haven't decided how to finish the drawer face edges, and I haven't nailed down the choice for the base. The scrolly-looking Quebec Provincial style doesn't match the simple chamfered top, so that's out. I think I like the plain base best, so far. It might depend somewhat on what I end up doing with the drawer edges.
The pulls I think I have narrowed down. I don't like the hardware pulls of most furniture styles. My personal taste is largely colonial, but I don't like drop pulls. I prefer craftsman or shaker wooden pulls. A single, chunky pull in the center of each drawer will be the most practical, and will look good to me. Usually when I'm working on a project I make it up as I go along, but this one is complicated enough that I'm going to make up a story-stick before I start cutting up material. More on this later.
Lost in Space
I can't say that I've been too busy to post. Well, I could, but I'd be lying. Instead, I've been too lazy to post. The less I have to do, the less I want to do it.
I just finished a small project. A shelf. Not a big, opulent, dovetailed black-walnut shelf, but a humble, painted pine practical shelf that blends into the wall and quietly does the job of holding my keys when I walk in the door. I should have taken pictures, and done up something special to make up for my woeful lack of energy in maintaining this blog. I didn't. So, for penance I'm going to start a larger project, and document it thoroughly. It will also be a painted project, though I'll likely add some poplar into the mix. Maybe a side-table. I'll mull it over and post back soon. Honest!
Sunday, November 30, 2008
Tool Technology
The recent release of Lee Valley Tools' new Veritas Dovetail Saw has caused some consternation on the hand tool forum I frequent, and the OldTools mailing list.
I can understand the initial scepticism, as the design is quite different from a traditional western dovetail saw. See below, in this image from their website, used without permission, but I'm willing to risk it since I've been a customer for over 20 years. Anyway, that's not really what a traditional dovetail saw looks like. Not at first glance. If you spend a bit of time looking at it then it actually gets more reasonable. It's still a pistol-grip backed dovetail saw with 14 tpi. Pretty normal, that. What's not normal is the material the back (or spine) is made from, and the way the tote (handle) is mounted to the saw.
Instead of a traditional brass back the saw has an injection molded composite back which Veritas says has glass fibres added for strength and rigidity, and stainless steel powder added to increase weight.
Instead of having a large tote that bolts right onto the blade, it actually bolts onto the spine. A traditional saw uses the blade as the primary structural element - the brass back attatches to the blade, and the tote attatches to the blade. This saw uses the spine as the primary structural element. The blade and tote attach to the spine.
Injection molding is a very efficient manufacturing method for producing parts with consistent tolerances, so if the molds are made properly the saws will be very consistent with few quality problems in terms of misaligned blades, etc.
This efficiency has left the saw with a very attractive price of only $65 Canadian. This puts it in the price range of decent Japanese dovetail saws.
I have several reasons for being fond of the manufacturing process... I used to build the type of grinders used to make the stainless powder for the spine, and I now work in the plastics industry.
So will I buy one of these saws?
Probably not. I'm quite happy with my traditional saws, but they cost a lot more than $65 each, hand-made by Ed Paik at Medallion Toolworks in Oakville. The hand-made approach allowed me to get a custom saw that is 2" longer than traditional, and almost an inch deeper. I wanted a big saw, and I was able to get that from Ed. I wouldn't be able to get that from Lee Valley Tools, and that's just fine because I'm not their target buyer.
I think the target buyer for this saw is a power-tool user or new hand-tool user who wants to try dovetails or other hand joinery, but doesn't want to have to pay a great deal for a new, premium-make dovetail saw, and doesn't want to buy a garage-sale reject and learn how to fettle it, sharpen it, and generally make it work. You might have seen my entry about this process in "New Life for Old Saw". Keep in mind that in that entry all I did was fix the teeth. I didn't bother cleaning the rust off of the blade, etc. Anyway, fixing such a saw is by far the cheapest way to get a decent dovetail saw, but saw sharpening is a new skill to learn, and not everybody has a saw vise, so then you'd have to buy or make one of those as well. So fixing an old saw isn't for everyone. Buying a new saw is fraught with peril because the known good brands of western saws are expensive. This might lead some to pick a Japanese saw on price alone. Now there is a western alternative in a similar price range, and I think that's great.
Those who have tried the saw claim that it works very well.
Wednesday, November 5, 2008
Lathe Tool Sharpening
I have a dirty little secret that woodworking videos put me to sleep. I have to watch them a few times to get all of the information in between naps. I love them, and keep buying them, but they put me out.
My all-time favourite cure for insomnia had been Rob Cosman's "Rough to Ready" wherein we get to spend an hour watching him plane one board. Little did I know that I hadn't seen anything yet.
I bought the video "Sharpening Woodturning Tools" by Mike Darlow. Oh boy.
First let me say that there is excellent information in there. His is the very first woodworking-oriented sharpening... thing... that mentions that you should never quench high-speed steel. This is something that machinists and metallurgists have known for almost 100 years, but woodworkers who use a bench grinder seem to be addicted to dunking their tools in water every 10 seconds as they're grinding them. You should never do this to high-speed steel as it will develop micro-cracks and you'll be just begging for a future fracture. Feel free to quench your regular carbon steel, but never quench HSS. Anyway, lots of info. TONS of info. Almost THREE HOURS of info. It's going to take me a week to see it all, between naps, but I'm glad I bought it. It covers every jig I've ever heard of, and sharpening every common lathe tool, though not hook tools or other esoterics... at least, not that I've been awake for so far. :)
The production quality is not professional, but it gets the point across.
Sunday, October 26, 2008
Driving the Lathe
I've been asked how I drive this lathe, since it's made to be line-shaft driven. The answer is in the image below:
I added a cantilevered track for a motor to slide on. I can slide the motor back and forth to make the belt drive sheave line up with the different diameter pulleys on the lathe headstock. The track runs the full length of the lathe because the headstock on this lathe can travel. Really. I can slide the headstock down to the tailstock end to do off-board turning. It's an interesting way to do things. The weight of the motor takes care of the tensioning on the drive. It works surprisingly well. The steel was all surplus, as was the wiring and the motor, so the whole thing was thrown together in a couple of hours for little to no money. It's ugly, but it works. I'll spiffy it up a bit.
Saturday, October 25, 2008
Resurrecting a Lathe
I've had this lathe for years. It's been sitting in the shed at my folks' farm for all of that time, but I've finally brought it home. I'm going to put a fresh coat of paint on the old girl, and this will be the story of that process. I think the lathe was made in Toronto quite a while back. Some time near the turn of the 20th century. It's also possible that it was merely sold by a Toronto company, and may have been made elsewhere some time previously. If it was, indeed, made in Toronto then it would have had to have been made after about 1910.
The first decision to be made is whether to treat this as a restoration or a re-creation. Do I try to maintain the ancient patina, and keep the aged look, or do I try to make it look the way it would have when it left the show room all those years ago? I'm leaning towards the latter. I think it would look dead sexy with a fresh coat of bondo, a new skin of gloss black paint, and gold pin-striping. Below is a shot of the maker's plate. Actually, maybe green... deep green... with gold highlights.... hmmm...
Tuesday, October 21, 2008
Thoughts on Kerf Width
The current push in dovetail saws is for the narrowest kerf you can get away with. My dovetail saw has four thousandths of an inch of set, which is a hair less than the thickness of a sheet of copy paper. That's not a lot.
Reworking the Crappy Crown Gent's Saw got me thinking about kerf because when I finished filing it the first time the kerf was still far too wide, I thought.
I did the test cut and the cut was fast, effortless and straight, but it was wider than I wanted.
Now I'm wondering about the effect of kerf on joinery.
Where you have two cuts forming an angle of significantly less than 90 degrees, a wide kerf will give you a poor corner. Either you will have a groove in one kerf wall, or you will have a slightly rounded inside corner. The narrower the kerf the less effect there is.
However, when doing something like a dovetail, the wider the kerf the easier it is to release the waste when chopping it out. The waste won't wedge as easily - you have more room for the chisel.
When cutting in general, the less kerf you have the harder it is to steer the saw, however having too much kerf is a poor choice, as you need to expend too much energy keeping the saw cutting straight.
The minimum amount of kerf is dependant on the wood being sawed, the depth of the saw blade, and desired radius of cut, when cutting curves. Green softwood requires a great deal more kerf than dry hardwood, a panel saw requires more kerf than a bow saw, and a turning saw requires more kerf than a dovetail saw.
I don't know if there is a magical formula out there where you can punch in your requirements and it tells you the proper kerf to use. I suspect most manufacturers just use traditional values as a basis point and modify it as required.
More mulling on this matter is required, but I'm starting to wonder if striving for the narrowest kerf is the correct path.
Monday, October 20, 2008
New Life for an Old Saw
I have an old Crown Gent's Saw that I bought new a long time ago (15-20 years) and never liked. It's got far too much set, won't follow a line, and basically cuts terribly. When I got it I had no idea how to fix up a crappy saw, so I threw it into a box and forgot about it. I found it a while back, but now I have good saws that I love so I had no intention of putting any effort into this saw. It could stay in the box.
Recently a thread started on the Canadian Woodworking forum that included the notion of refurbishing a Crown Gent's Saw. A suggestion that I made was not taken gladly by some, so I've decided that I will refurbish my own elderly Crown Gent's Saw in the interest of proving the point that the method works.
First, the saw. Here it is in its crappy glory.
It will be refurbished into a dovetail saw, so for that it will need a rip-pattern tooth form, and it needs to have its set radically reduced. First, reduce the set. Take a pair of hardwood blocks and lay the saw between them. With raps of a hammer you can squeeze the teeth together to reduce the set. Depending on the size of your blocks, it can take a surprisingly hard hit. Below is the setup that I used for reducing the set. A chunk of red oak (would have preferred something harder) with another piece of red oak as a 'punch'.
Once the set was reduced it was time to file. I put the sad saw in the saw vise and got out my smallest saw file - brand-spanking-new. Only the best for the crappy old Crown Gent's Saw. :)
Now to file it to a rip cut. First I ran a mill file over the top to joint the saw. Not that I expected the jointing to be off... this saw had never been sharpened (or used, really) so the teeth should be in factory condition, but by taking a light jointing pass I can more easily see where I am in the filing process. After filing the saw I tried it out. I had done two test kerfs in a piece of white pine before starting on refurbishing the saw. The test board can be seen below. The two 'before' kerfs are each the result of 50 strokes of the saw. The 'after' kerf is the result of only 12 strokes of the saw, and I had to stop because the spine had hit the top of the board and I could go no deeper. The saw now cuts fast and straight, and all for about 20 minutes of effort. If I had it to do over again I would have done some more beating on the wooden blocks to reduce the set even more. The last kerf in the test board is from my Medallion dovetail saw. Only 8 strokes. Nice. Much longer saw, though, so it has a bit of an advantage, there.
Anyway, that was my refurbishing of a Crown Gent's Saw. It's not hard, so if you have one that you hate then have a go at fixing it up.
Saturday, October 18, 2008
Dovetail Angles
Dovetail angles are often described by the ratio of rise to run. Historically, in the western tradition, dovetails would be made with an angle of 1:6 for softwood, and 1:8 for hardwood. This equates to about 9.5 degrees and 7.1 degrees from normal to the end of the board, or basically 9.5 or 7.1 degrees away from being a finger joint instead of a dovetail. Some people feel that the easiest way to get by in the dovetailing world is to use 1:7 on all material as a compromise. This equates to an angle of about 8.1 degrees.
My question, of course, is who cares? We're talking about less than two and a half degrees difference between the whole range of them. Who is going to be able to tell what ratio you used when looked at from any kind of a distance. A person with a good eye might be able to guess, but you'd need to take a gauge to the piece to be sure, and anyone who takes a gauge to anything I made deserves whatever disappointment might be forthcoming. :)
So what do I use? I use the 1:6 ratio for all woods. I figure if it's going to be a dovetail then I might as well pick the one that looks the most like a dovetail.
Below we see a quickly cobbled dovetail that I just did this morning for the sake of illustrating this point. This joint has two tails. One is at 1:6 and one is at 1:8. Even right side by side and zoomed in it's not that obvious that they're different angles. At most you might think that it was a minor variation caused by hand-cut joinery. Certainly it wouldn't scream at you from across the room. So I, for one, don't get all excited about dovetail angles.
Frank Klaus, master cabinetmaker and father of dovetail excitement on this continent, doesn't use a gauge. He eyeballs the angles. He doesn't even measure out the spacing. He eyeballs everything except the depth of the cut (which must match the thickness of the board being joined to). Despite his carefree methodology, his experience is legendary and he can cut seemingly air-tight dovetails in the time it takes most experts to do the layout.
Friday, October 17, 2008
Dovetail Gauges
There are a whole bunch of different dovetail gauges on the market. I've bought a few, and made a couple, and these are what I have left. At the right in the image above is an adjustable bevel. This is the traditional way in many western cultures to gauge your dovetail angle. You set the bevel to the angle you want, then use it to mark the work. This works, but the adjustable bevel is relatively heavy, and the angle could creep when you set the gauge down and pick it up again for the next board, etc. The adjustability can be a drawback. The next gauges, moving to the left in the image above, are the Veritas Dovetail Markers. Very inexpensive, very light, generally inoffensive, but they lack an important feature, and that is being able to mark the angle and the square line on the adjacent face with the same tool and placement. It is a great luxury to be able to set the gauge in place and mark both lines without moving the gauge, thereby guaranteeing that the marked lines are in the same plane. The lack of this ability is a failing of the adjustable bevel, as well. At the far left in the above image we see a dovetail gauge that I made. I'd seen a gauge in Ernest Joyce's "Encyclopedia of Cabinetmaking" which I thought was almost perfect. It was a double-sided affair that had two angles on it, so that one gauge could be used for hardwoods and softwoods. Rob Cosman found the same image, and uses it, (and sells them) himself. I didn't like that it had two angles on it. It wouldn't take that much inattention to pick up the gauge and use the wrong side. Also, you had to flip the gauge over to change the direction of the angle when you're marking the other side of a dovetail. I would prefer to have one gauge for each angle that I'm likely to use. The first one I made was like Joyce's original, but I soon started modifying it, then started over when I realized that the two-angle design wasn't good for me. To this end I made mine with only one angle, but both edges have the same angle so it can do both sides of the dovetail by just sliding it back and forth. No flipping and flopping, and no chance of using the 'wrong' angle. This was the best gauge so far, and in some ways is still my best gauge.
The last is the best commercial gauge I have. After using my wooden gauge for some time I discovered the Veritas Dovetail Saddle Marker. it is a commercial version of mine. I guess great minds think alike. :) It has all of the features of mine, and is larger. What makes mine still a bit better is that it is much lighter, and warmer in the hand (being wood instead of metal). If you want to buy a commercial dovetail gauge, I think your best bet is the Veritas Dovetail Saddle Markers.
As to which angle to use? Well that is a discussion for another day...
Tuesday, October 14, 2008
Puttering - good for the soul
This weekend was a puttering weekend. I installed a garage door opener so that I won't have to drag my weary carcass out of the car to open the garage door when I get home from work in the winter, I cleaned up the garage a bit, and worked on the new saw till. It's now structurally complete except I still have to make the drawer. I still need to put the finish on it, and I wanted to put a few plugs here and there. Unfortunately, the plug cutter I got from Lee Valley doesn't seem to be particularly good at being powered by a brace. I'll need to put a custom driver on it to fit the drive socket on the brace, or modify the stem of the plug cutter to be tri-lobular so the three jaws of the brace can hang onto it properly. I also did some mechanical work at the folks' farm to fix an old yard hydrant. It's ancient, worn out, and should be replaced, but replacing it would require knocking out part of the barn foundation, so basically I'm trying to make a silk purse out of a sow's ear because the price of silk just skyrocketed.
I have added a few new planes to the stable. I might have mentioned them before, but now I'm showing them off. :) At the back is a matched set of Veritas bevel rabbet planes, one right hand and one left hand, and at the front left is a Veritas rabbet trimming plane, and at the front right is a Veritas bull-nose plane, which would have made those stopped rabbets on the saw till a lot easier to deal with had I had it at that time. Next time I'll be ready!
Sunday, October 5, 2008
Tools of the Trade sale
I just got back from the Tools of the Trade sale (TOTT) in Pickering, Ontario. I think I did alright.
This was The TOTT of the Auger for me. I wanted a set of auger bits.
Right away I stumbled upon the two sets in ratty, smelly old fabric pouches, plus the brace shown, all for $20. I didn't try to haggle at that price. There are three bits with spurs missing, but there are enough duplicates that I've got at least one of everything.
The brace turned out to be a sweet user, and is now my second-best brace.
However, as is often the case I didn't stop there. I found a boxed set of 13 Irwin bits that cover more ground than the sets I already had in hand, so I bought them. That set included another expansion bit. All in excellent condition. Then I started wondering if I'd rather have Russel Jennings pattern augers, so when I saw a boxed set of 13 of them I bought them as well. All in excellent condition, though the smallest one is actually an Irwin, not a Jennings. All told I spent less for these 46 auger bits than I would have for one set of 7 new Russel Jennings pattern augers from "Traditional Woodworker". Nice. I can use some of the beaters to make augers for end-grain applications where you don't want spurs.
Finally I looked at my list to remind me of what else I had planned to get, and soon found a lovely Mathieson adjustable panel-raising plane, which I have wanted quite badly, and a downright devious match plane, which I have wanted even more. I'd never seen such a thing as this match plane, though they are apparently not as unusual as it seemed to me. The fence rotates on an eccentric mount to allow the same cutter to be used for both the groove and half the tongue, with another cutter mounted for the other half of the tongue. Bizarre, but effective. It was about twice the cost of a regular Stanley match plane, but it was too cool to resist. I've already tried it, and even with the nasty dull cutters in it it works a treat. Lastly I've got a big old Sorby in-cannel gouge, which I might convert to out-cannel... not sure yet... and a very nice saw set. Oh, one thing that I missed adding to the picture was a tiny little pair of fey-pattern dividers that I got for $5. Very nice, indeed.
Tuesday, September 30, 2008
Chestnut Sharpener
I know what you're thinking. You're wondering who in their right mind would want to sharpen chestnuts. I wondered the same thing, but wonder no longer! I just got this little dealie here from Lee Valley Tools (and pinched the image from their website). It's a knife sharpener. It's made in Canada (well, the handle is made in Canada and the company manufacturing it is Canadian), it's guaranteed for life, and it works! No, it's not going to put a polished edge on your chip-carving knives, but I had brought home my cable knife from work to try it out. My poor cable knife, used by electricians and me to cut things that really shouldn't be cut with a knife, like copper wire, and doing horrible things like digging plastic out of metal cavities with the tip, was in rather sorry shape. Not hideous shape, because, hey, it's still my knife, but it was rough. I pulled it across this pocket-sized sharpener a few times, and I could shave hairs off of my arm with it. No, not perfectly cleanly in a honed-on-16000-grit-ceramic-and-then-buffed-on-virgin-sheepskin-with-sub-micron-diamond-paste kind of way, but there was shaving going on, and it took less than 5 seconds to do the sharpening, so I was pretty darned impressed. Impressed enough that I'm typing this blog entry instead of going to sleep like I would be doing if I wasn't suffering from temporary insanity over this knife sharpener. I'll have to buy another one to keep at home because this one is going to work with me. Oh, and it cost less than $16. Sweet.
Saturday, September 27, 2008
A Tale of Two Saw Tills - The Beginning
My old saw till works just fine. It didn't end up as quite the saw till that I had originally planned... I had intended it to hold 6 panel or back saws, but I had forgotten about all of the small saws, so in the end I used it for 2 panel saws and 2 back saws, with the small saws mounted on the back. When my two new Medallion saws arrived the old panel saws were relegated to a nail in the dark closet which has become the Purgatory of Unloved Tools. By the time I have my two new Medallion panel saws I must have a reasonably worthy saw till. The old one is simple but effective. The large back holds the small saws in a very visible manner, where they are reasonably easily removed and replaced. The back-saws are even easier to remove and replace. The bottom of the till is a sort of 'bin' that holds dovetail gauges, saw files, and other saw-related things. However, as the bin fills up I worry that I might accidentally (and the thought makes my marrow quake to think upon) scratch the tote of one of my Medallion saws when grabbing a saw file from the bin. This is unacceptable!
The new saw till will be larger, yes, but it will have a drawer into which to shove the various bits and pieces that now fill the bin. The bin will still have some use, but it will have a vertical divider to keep pointy, scratchy things away from the saw totes. At the right in the picture of the current state of the new till we see that the front wall of the bin has a large cutout. This will allow easier access to the contents of the bin, which will be primarily the saw wax and other things that are used very often. The bin will be smaller than it was before, but more accessible, and not prone to harming the saw totes. The drawer, which will be below the front wall of the bin, will hold the majority of the stuff.
The only things that I have done thus far to try to make this till a bit more visually appealing is to add a shallow rabbet and chamfer to the edges of the back, and chamfer the edges of the sides, etc. The rabbet was wonderfully easy to do with the new skew rabbet planes from the good folks at Veritas... at least until I got to the 'stopped' part. These are stopped rabbets, and it was a pain in the butt to clean up the stopped ends. I tried a few different methods to sort it out, but in the end I just pared them with a chisel.
Some of you might have noticed that the back and sides of the till are all vertical grain, but the front is horizontal grain. This may well come back to haunt me. Particularly with the drawer.
So far so good. OOoops.. 6am already... time to get ready for work.
Friday, September 26, 2008
No Rest for the Weary
No rest for the wicked, and the good don't need it. That's what they say. I must not be very good, because I could use a bit of rest. The six-day, sixty-plus hour work weeks are irritating. This week will be a bit of a novelty since it will be a seven-day work week. I haven't added up the hours. Ignorance is bliss. Actually, the long days wouldn't be so bad if I wasn't getting phone calls in the wee hours asking how to fix things at the plant. Two calls last night. No sleep. There but for the grace of my paycheque go I.
I've been trying to work on my saw till.
Right now my saw till holds four saws of back-saw or larger size, with other little saws pinned to the back. Since adding a couple more Medallion back-saws to the collection I've been storing my nasty old panel saws by hanging them on a nail in the store-room. Sub-optimal, at best. Since I have every intention of getting some lovely Medallion panel saws to replace them, I will soon need a bigger saw till.
The plan at first was just to make another like the first, just wider with room for six saws instead of four. Then I decided to make it taller so that it could have a drawer in it.
The existing saw till is just held together with screws.
I cut out a bunch of pieces, then thought maybe I'd try to spiffy it up a bit. Put some sexy joinery in it.
I tried to figure out how I could add joinery given that most of the joins are in the long grain of the wood, not the end grain, and the pieces I've already cut are size-for-size with no extra room for joinery.
I've given up on the idea of sexy joinery. I'll screw it together and be done with it. I am still adding a few embellishments, though, which I need to post about, but not right now... it's after 6:30 and I have to get to work.
Sunday, September 7, 2008
Sharpening. What works for me.
Sharpening blades is a metalworking activity, and metalworking is what I do, and what I'm used to. At first I automatically gravitated towards diamond stones, because that's what I'm used to. I've got a diamond hone that I've had bouncing around in my toolbox for over a decade. Maybe 15 years, now. Still works great.
So when I got into woodworking I bought diamond stones, and used them, and liked them.
Then I needed something finer, so I bought ceramic stones. Again - something I was used to. I didn't want oil stones (which I'm also used to) because of the mess.
Eventually I got tired of hearing about how great water stones are and how they are the One True Path for sharpening, so I bought a few to try them out.
The following is about what I have, and what I actually use.
Firstly, here are my diamond stones. The small one is a roughing stone, 250 grit, 6"x2". It is rarely used.. it's only needed to fix a chip in a chisel or something like that. The larger stone is double-sided with 600 grit on one face and 1200 grit on the other. This is still my most-used stone, and if I had to have just one this would be THE ONE. These are DMT stones with the drilled sharpening plate, obviously. I like these a lot for plane irons and chisels because the swarf (that's the 'metal dust' that is abraded from the object being sharpened) falls into the 'holes' and doesn't cause scratches in the finish. These are not great for small gouges or small knives or anything else that will poke into the holes and get maimed. For that you want a flat, undrilled plate, which DMT makes as well.
Next comes my first polishing stone. This is a ceramic stone.
I like ceramic stones a lot because they cut fast, and will happily do the job with just a touch of lubricant, which can be anything handy. I use mineral spirits as the lubricant for both the diamond stones and the ceramic stones, because it evaporates and won't cause rust.
Here are the water stones. I've got two 1000 grit Nortons, plus an 8000 grit Norton. The reason I got two 1000 grit stones is so I could use Rob Cosman's method of keeping the stones flat. It works.
And here is my current sharpening jig which I use when grinding the bevel. I do honing by hand, and I'll get to that in a minute, but I like the jig for getting the angle right on the bevel. I use the Veritas Mark II, and I have the cambered roller for lightly cambered blades (smoothing planes).
So what do I actually use? Good question. At first I used the jig on the diamond stones and was happy. The blades weren't really sharp enough at only 1200 grit, but most of the time it was actually just fine. When I needed more sharpness I bought the ceramic 8000 grit stone. It's too small to easily use with the jig, but I used it anyway and it worked.
When I heard the siren call of the water stones I pulled out the VISA card and bought them, took them home, and spent a weekend sharpening everything I owned. At first I liked them. I really did. If you're going to do a serious hours-long sharpening session, they work great. For touch-ups they suck. Why? Mud. They get mud all over everything. It's horrible. And if that wasn't bad enough, I found spots of rust on some of my blades the next day, and also on the bedding surfaces of the planes. I thought I'd wiped them off well enough, but I guess I hadn't. That wasn't a good morning for me. I wasn't happy at all.
At one point I considered using just the 8000 grit water stone, because it doesn't need to be soaked, just spritzed with water. I could use a diamond stone to keep it flat, and just leave the 1000 grit stones in the cupboard. Then I got wise.
I got myself a 'secret weapon'. Yes! Cast a loving eye on this beauty!
What? You expected high-tech? From the hand-tool-only guy? Nope. An elderly Craftsman hand-cranked grinder with a hard felt wheel charged with the green honing compound that Lee Valley sells. Oh, it's... it's just magical. I can take a chisel from the 1200 grit diamond stone, give it a quick hone on the hand grinder, and it is shaving-sharp. I mean, the unwary could shave clear down to the bone in a heartbeat. It's wicked sharp. So once in a blue moon I use the non-rusting-mineral-spirits-lubricated diamond stones with the jig to establish my angles, then I just buff the tool as required on the wheel. No need to remove the wire edge, either... it just 'vanishes'. When it's gone, you're done. You don't touch the back of the blade, you just hone the bevel. This thing works gangbusters for carving knives and whatnot.
Of course, 19 times out of 20 you just need to touch the edge to the wheel again to re-hone it. Re-grinding the bevel is a rare occurrence around here.
I'm considering making a grinder (yes, a powered one) that would have easily replacable wheels so that I could have different firmnesses of felt, or a buffing wheel, or different profiles (for gouges, etc.). I'm still mulling over the design.
In praise of paring
My natural inclination is to hit things with a hammer. It's in my blood. I got into metalworking by way of blacksmithing, so it might be excusable.
This post is not about hitting things with hammers. This post is about using a paring chisel, and it's a process that can be peaceful or poisonous depending on how well you sharpen your chisel.
Firstly, let's meet my favourite paring chisel.
Normally, a paring chisel has a very long blade to allow more control, and to help to get into places that are far from an edge. My favourite paring chisel is no different, but because it is so wide, and the handle is so long, it looks perfectly in proportion.
Shown are two chisels. The paring chisel, below, doesn't look particularly unusual until you realize that the chisel above is a 1" Hirsch firmer chisel. That would normally be considered a pretty beefy bench chisel. The 1-1/2" Sorby paring chisel dwarfs the Hirsch considerably. The blade on the paring chisel is quite thin, and the bevel is long, with an angle of around 20 degrees.
The chisel is so big, with so much surface for registration against the work, that it is easy to take the cut that you want. It's lovely.
It is paramount that you keep a paring chisel very sharp. Very, very sharp. I'm going to get into sharpening in another posting very soon.
Here is a shot of paring to a straight line. I intentionally stopped short on the hacking cuts because I wanted to leave the 'shavings' (chunks, really) in place so you could see them. Paring need not be delicate. Normally I wouldn't pare right to a line, I'd leave a bit for finishing with a plane or spokeshave. You can't take too thick a section of wood at once or it will split out. If you begin hacking at the far end then what you're paring off is flexible enough that it won't interfere and works just dandy. This was all done just by pushing the chisel. No mallet.
Another shot, this time of paring to a curved line. Same process.
Something that a paring chisel is particularly good at is cleaning up end-grain. If you just push the chisel then you get the same kind of cut that a plane would take, which isn't always optimal. The cut to the right was taken with a straight push, and the shaving is sitting there. The cut is pretty good, but it's a bit 'cheesy' as the old books say. It has the slight voids and general visual texture of sliced, aged cheddar. It looks okay, but it feels a bit rough.
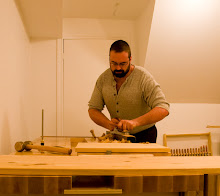
However, there is a cut that the old books call a 'compass cut' which works wonders on end grain. In this cut you select a point on the chisel, usually about as far back from the tip as the blade is wide, and this will be your axis or swivelling point. You press your thumb hard on this point of the bevel-up blade, and swing the handle back and forth while pushing forward and the net effect is that you get a slicing cut. It's not as fast as a straight push, but it leaves a finish as smooth as glass. You can see in the shot to the left that the left-hand side of the surface, the part done with the compass cut, doesn't reflect light from ragged end-grain the way the right hand side does. It doesn't look hugely different, but it sure feels different. Oh, and I didn't even sharpen the chisel before paring that end-grain. I haven't sharpened this particular chisel since the last time I used it a couple of weeks ago. More on sharpening later.
Saturday, August 23, 2008
Acquisitions
It has been a little while, gentle readers, but I have crawled back up on the wagon and I'm hanging on with grim determination.
In the past little while I've been on a bit of a buying spree, having picked up the new Veritas rabbet trimming plane, as well as all three of their 'normal' spokeshaves, the missing sizes from my mortising chisel collection, spoon bits, beading cutters, and I have the new skew rabbeting planes (the pair) on order, though they aren't actually available yet. Curses! From Robert Sorby came a 90 degree chisel for those pesky mortise corners, and a 1-1/2" paring chisel, which is a glorious piece of work. I am liking this chisel. I'm going to buy the other sizes in a few weeks. The bevelled edges are nice and thin for those tight dovetail corners, and the blades are loooooong and easy to control.
A bit of good news is that I heard from Ed in Oakville at Medallion Tools and I should have my two new back-saws in a couple of weeks. Sweet.
Now I just have to do something with all of this stuff. Or do I? Am I allowed to acquire and amass these tools and do nothing particularly 'important' with them? It's an interesting question.
Still, I would prefer that I was doing more with them than I am, so I will endeavour to do so. More on this later.
Sunday, July 20, 2008
Thoughts on painted furniture
People have been making painted furniture for a long time. It ranges from gilded, lacquered, 'regal' furniture, to homely painted country furniture. Some feel that 'painted' means 'inferior'. I disagree. If I have to pick between press-board furniture with a thin veneer of hardwood on it, or solid wood furniture with paint on it, I'll take the real wood, thanks. When it comes to furniture that you're likely to find in an average person's home, painted pine is probably the most common painted furniture. There are other common finds, like 'princess suite' bedrooms which are painted white with faux gilding, and whatnot, but painted pine is probably the most common, in my opinion.
I like this furniture. I'm going to focus on making a few pieces in the near future. I'm not 100% decided whether I'll use poplar or pine, but I'll pick some wood up in the next few days and get going on at least something simple.
Tuesday, July 15, 2008
A plethora of Woodworking Books!
In the last two days I have received in the mail:
"Ancient Carpenter's Tools" by Henry C. Mercer
"Illustrated Cabinetmaking" by Bill Hylton
"Hand Tools" by Aldren A. Watson
"Tage Frid Teaches Woodworking" all three books including
"Joinery"
"Shaping, Veneering, Finishing"
"Furnituremaking"
"Identifying Wood" by R. Bruce Hoadley
"Understanding Wood" by R. Bruce Hoadley
and
"Pleasant Hill Shaker Furniture" by Kerry Pierce
I read the book on Shaker Furniture last night (most of it) and today I'll be starting on "Ancient Carpenter's Tools." Sweet.
Sunday, July 6, 2008
To crown or not to crown
Gentle readers, I have had an epiphany. It has to do with crowning plane blades, and names for planes.
I read an article by Adam Cherubini about the subject, and it resonated with me to such an extent that my ears are still ringing.
An archaeologist and historian named Henry Chapman Mercer wrote a book in 1929 called "Ancient Carpenter's Tools" wherein he decided to classify tools in order to give them 'true names', similar to the way biological nomenclature works. I liken it to genus and species. Using this analogy, the three genus of planes were set as levelling when the plane is used on a surface to make it flat and/or smooth, fitting when the plane is used on a surface no wider than its blade to create a new surface that will match another surface, and lastly ornamentation, which is where a plane is used strictly for a decorative effect.
Within each genus there are many possible species, but all share common traits. Yes, there are exceptions. There are always exceptions. However, here are some common traits:
Levelling planes like fore planes, smoothers, and try planes, have crowned irons and tight mouths. Exception - the fore plane has wider mouth as the surface finish isn't as important as speed.
Fitting planes like rabbet planes, match planes, plow planes, router planes, etc. have irons ground straight across and are used to produce the surfaces of joints. They have wide mouths because the surface won't be seen in the final product, so the surface finish isn't important. The exception is the jointer plane, which should have an iron ground straight across like other fitting planes, but it has a tight mouth because leaving a rough surface can be visible from the side when the joint is glued.
"But Mike!," I hear you exclaim, "the experts pretty much all use crowned irons in their jointer planes!"
Here's the interesting bit. Are you ready for this? Those aren't jointer planes. Those are try planes. Try planes are levelling planes, with a crowned iron. A jointer plane is used only for jointing edges for glue-up. Making a joint. That's it. It's a fitting plane.
Long has the nomenclature been rather... lax. Jack planes and fore planes are, in some books, the same, and in other books different. The same goes with try planes and jointers. I think Mercer was on to something.
I have a 'jack plane' which I use only for fitting, with a straight iron, so it is actually a short jointer.
I have a 'jointer plane' which I use for levelling, with a crowned iron, so it is actually a try plane.
I have a 'block plane' which I use for levelling, with a crowned iron, so it is actually a smoother.
It may seem complicated, but for me it has made things a whole lot clearer, and also clears up the reasons for some of the previous confusion. A wooden plane 24" long could be either a jointer or try plane depending on what you were going to use it for. Put a flat grind on it and it's a jointer. Put a camber on it and it's a try plane. If the plane didn't have an iron in it, then what kind of plane would it be?
The common jack plane, I suspect, was called such because you would have multiple blades for it and convert it from a short jointer to a fore plane to a short try plane on a whim.
Overhead Rack
Above the bench I mounted a 12" wide, 5' long piece of laminated pine shelving, which I drill into and mount shaker pegs on. I don't have that much on it yet, but I'd rather have the space and not need it then need it and not have it.
Currently I have my small egg-beater drill, breast drill, three braces, drawknife and pull-knife, and hammers all mounted there, with lots of room to expand.
Saw Till
Now that I have some saws worth having (Medallion Tools... nice...) and more on the way, it was time to build a saw till. My needs are relatively meagre compared to a serious saw aficionado, so I went with a relatively meagre saw till. Still, it stores all of my saws, so far, and also stores all of my saw sharpening gear and other 'saw oriented' stuff.
Right now I'm light on cross-cut saws. I have two on order from Medallion, but it takes a while. I have my saws made with light coloured steamed-beech totes if they're a rip pattern saw, and dark totes (some weird carmelized maple) if they're a crosscut saw. It keeps me from grabbing the wrong saw as easily. At the top left of the rack is a Veritas 'dovetail saw'. It came packaged with a magnetic dovetail guide that I got as a gift. It actually has its moments. Moving clockwise, next comes the legendary Rip Tooth Dozuki from Lee Valley Tools. Great little saw, but after trying them, I'm not so happy with pull-saws, and I'm going back to push-saws. Next is a somewhat generic 'gent's saw' which I rarely use. My big rip saw is a Disston, but not old enough to be particularly good. It works. The cross-cut panel saw is also a Disston. Same comment. It works, but I'm looking forward to replacing it. Next is my Medallion Tenon Saw. Nice... and my custom big-ass Medallion Dovetail Saw with a 12" blade and 2.5" depth of cut below the back. Ooooh baby. Lotsa beef, there. Fab on hardwood. Grabby on pine. It's worth it. Oh, and last but not least is the Kugihiki from Lee Valley tools. It's a flush-cut saw, and a pull-saw is better for that particular application. It's a great saw, particularly for the price. "Woodworking" Magazine did a comparison between several brands of flush-cutting saw and this one won. Colour me smug. :)
Past the saw till is the clamp rack for the gluing clamps. Those are the Lee Valley 30th anniversary aluminum clamps. Not fabulous clamps, but an excellent deal.
Labels:
Hand Saws,
Hand Tools,
Shop,
Tool Storage
Main tool shelf
This shelf was my first storage project for the wood shop. The general idea is cribbed from Robert W. Lang's column in the Autumn 2007 issue of "Woodworking" magazine. When I first built it it was so full of tools that it was virtually unusable. Now that I have the plane till and saw till and overhead storage... it looks a bit bare. :)
This shelf will be used to store my more often used chisels and layout tools. My gimlets and awls are in holes along the left vertical of the shelf. I also store my surface clamp and bench dogs here.
Plane Till
When I built my plane till I first built it much flatter to the wall. I did some experimentation to show that the angle was sufficient for the planes to stay in place. What I didn't calculate in was the 'pucker factor' every time I set a plane on the till and just wondered if this would be the time that it would fall off. After a week I hadn't dropped a single plane, but it was wearing on my nerves so I rebuilt it with almost twice the depth. This causes more 'shadow' over the bench, but it's worth it both for my peace of mind, and for the extra shelf space below.
To the left we see the plane till. From left to right, top to bottom, we have a Veritas Bevel-Up Jointer, which I use as a try plane, not a jointer, and old Stanley #6 which I use as a fore plane, a Veritas Low-Angle Jack plane, which I use as a fitting plane, not as a levelling plane. Next comes the Veritas Bevel-Up Smoother, the Veritas Scrub Plane, a Veritas Low-Angle Block Plane with the extra tote and knob to turn it into a "#3 Smoother", Veritas winding sticks, a Stanley G12 low-angle block plane that I bought, perhaps, 15 years ago, and a Veritas low-angle block plane which normally always has a Veritas Chamfer Guide on it. On the shelf below we have a Veritas Router Plane with all of the trimmings, a Veritas Small Router Plane, a Veritas Jointer Fence for the Low-Angle Jack, a Veritas Small Plow Plane plus the blades, a Stanley #78 Duplex Fillister plane, and a Veritas Small Shoulder Plane.
Attached to the side is the piece of 2x4 that I use as an index for my augers, and that stick hanging on the tie peg is just a piece with different sized holes in it (all bored by my auger bits) which helps me figure out what size hole I need for various applications.
First entry - my shop, and why I have it.
I'm a metalworker by trade and training. In the past I've worked in structural steel, machining, welding, fabrication, and machine building. Now I've dusted off the other half of my training in industrial mechanics, and work in maintenance keeping machines running for a manufacturing company.
My shop is an anodyne for what I do at work. I don't want to come home and turn on a milling machine. I'd rather do something different. I went with woodworking, which believe it or not I had some training in as a millwright. At first I considered getting a planer, jointer, and other woodworking machines... after all, I like machines... but the environment that I work in requires eye protection, hearing protection, etc. I wondered how much fun it would be to have to put ear plugs in to work in my own shop after wearing ear plugs all day at work. I decided I'd rather give that a miss. So my shop is pretty much hand tools only. I have a cordless drill that I use when I need to drill a hole with one hand, or where an egg-beater won't fit, and I have a grinder to grind primary bevels on the plane irons when that is required (rarely).
My shop is a modern hand-tool shop. Although some of the techniques that I use may be 18th century, as a general rule I like new tools. The boys and girls at Lee Valley Tools and Veritas have made a ton of money off of me. :)Above is the widest aspect picture I could take of my shop. I ended up using a digital super-zoomer to get this much in. At the left is the plane till, then the main tool shelf, then the saw till, then the clamp rack. Above is the overhead storage.
Subscribe to:
Posts (Atom)